Guides
Featured Guides

Biohazard's Mortal Kombat 1 Reiko Character Guide
Pro player Biohazard's guide on the grappler and part-time zoner Reiko to teach you all the secrets of this incredible fighter

Mortal Kombat 1 Reiko Character Guide by K7 Showoff
Whether it be zoning or grappling, Reiko has a wide array of interesting tools to gain the upper hand and achieve victory
Mortal Kombat 1 Reiko Character Guide: All You Need to Know
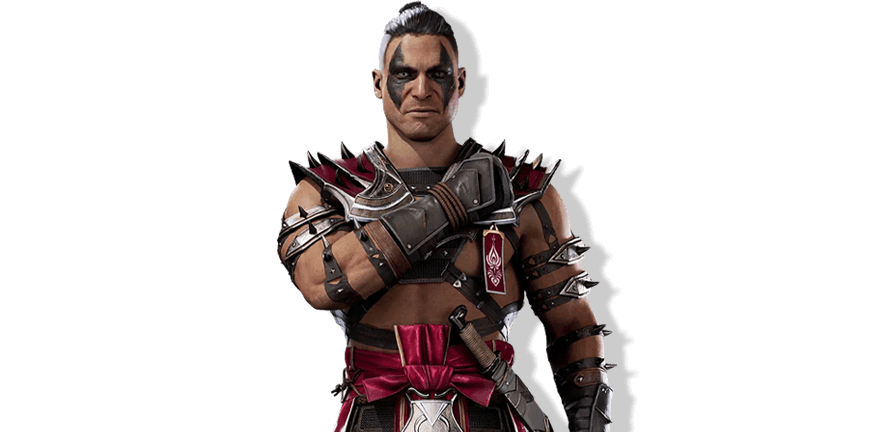
Reiko is quite a powerful pick in Mortal Kombat 1. General Shao's Lieutenant is a capable close-quarters fighter with plenty of command grabs and ways to side-switch and extend combos from up close and a threat from a distance, though not entirely perfect.
His normals are pretty strong; he can put down pressure and punish opponents when they whiff or try to break up his rhythm. Yet his combos, although full of grabs and side switches, can't output the same damage as other characters without leaning on their amplified (or EX) versions.
If you want a pro player to break down the character for you, you can check out our collaboration with Biohazard below to learn how a top player in the NRS competitive scene tackles this character.
However, this text guide is intended to give you a wider scope, and teach how to work up your way up with Reiko so you can start taking names in Kombat League.
MK1 Command Inputs
Reiko's Gameplan & Specials
The thing you need to know about Reiko is that he is a grappler at its core. The character wants to be close to his opponents and, more importantly, stay grounded.
Although he has access to launchers and air combos to follow through, you want to start practicing getting the most out of the few times you have your opponent on the air to set up further pressure or combo into other attacks.
Reiko's normal are nothing to scoff at, he has a lot of range on them with his B3, D3, and B4 being great tools to snipe an opponent out in neutral. Although not all his strings are solid, S1,2 and F1,2 are fantastic tools to strike with when up close.
In case you want to back off and take on a more zoning approach, you have F4, a wonderful kick, with which to push people back and knock them down.
Charging Pain
A handful of Reiko Specials also have slight variations that make them deadlier. Charging Pain (BF3), for instance, is usually a low-hitting attack. Yet you can hold up (or Back) during it to convert it into a mid that also launches opponents. The other alternative is to amplify it to be a low launcher and side switch attack. Not happy with just those? You can also cancel it by pressing down twice or delay the active frames by holding down 3.
Charging Pain is not just a tool to close the gap either. It can also be a gapless special cancel launcher on a hit-confirmed S1,2 string. You usually would complete F1,2,4 to produce a launcher, and although F1 is an excellent normal, its string does have a gap between F1,2 and 4, leaving you open to counters. Thus, S1,2 BF3 become more reliable tools to initiate because S1,2 is safe on block.
Pale Rider
The other major tool in Reiko's arsenal up close is his command grab, Pale Rider (BDF1), which also features two variants. Like all command grabs in MK1, these are true throws that opponents can't escape. The first way to change it is by holding Back during the animation, thus avoiding the side switch. The other is that normally the attack is a high, but by amplifying it at the cost of 2 bars, you can convert it into a mid, meaning it is almost inescapable.
Pale Rider is fantastic, it deals a great amount of damage and its animation is long enough that it can help buy time for kameos to recharge. Its side selection also makes a great threat in the corners. Finally, depending on your Kameo selection, you might be able to get a full combo out of an initial Pale Rider, with for example Darrius' re-standing kick, though it can be a challenge to get the combo out reliably.
Tactical Takedown
Reiko Lunges for the legs, dropping his opponent to the ground and throwing a pair of punches for good measure. Tactical Takedown (DB3) is a solid mid. Although not a command grab, it can be blocked, it does make for an excellent combo ender, and it is also Reiko's go-to armored wake-up. It can be amplified to add armor and some extra damage, but you generally won't want to do it out of the blue.
In contrast to the other specials we've listed so far, the takedown is always a side switch no matter what, so be mindful of that when you go for it. Finally, it the move also leaves you at +15 frames, which is not enough to do a lot after it, but it is perfectly suitable to try to jail your opponent with F1 if they try to wakeup with buttons.
Assassins Throwing Stars & Retaliation
The last two specials we will touch on are Assassin Throwing Stars (BF2) and Retaliation (DB1). Compared to Reiko's other specials, these are pretty straight forward. Throwing Stars is his go-to ranged projectile and a surprisingly good one that often trades in his favor. It can be amplified a well for some extra projectiles and damage which can come in handy when facing opponents with armored approaching moves or when they are using Sub-Zero Kameo's armor.
Retaliation is even more simple. It gives you a short window of time when your opponent's attack will be parried, and they will be knocked down. Its amplified version can be pretty useful, though, as it takes away the knockdown, allowing you to go straight into a combo afterward.
Specials Table
| Name |
Input | Tips |
| Retaliation | DB1 | Parry into a knockdown, has an 8F startup. If your opponent spams slow normals, try this. |
| Enhanced Retaliation | DB1 + AMP | Keeps the opponent standing, good to convert into combos if you spend the bar |
| Pale Rider | BDF1 | High Command Grab, solid damage on its own, side switches |
| Pale Riding | BDF1 + Hold B | Same move, it just avoids the side switch |
| Enhanced Pale Rider | BDF1 + AMP | Changes the command grab to a Mid, costs 2 bars |
| Assassin Throwing Stars | BF2 | 3 ranged projectiles |
| Enhanced Assassin Throwing Stars | BF2 + AMP | Adds 2 more projectiles |
| Charging Pain | BF3 | Slide Tackle low that side switches |
| Pain Knee | BF3 + Hold U or B | Now a mid with a launcher |
| Enhanced Charging Pain | BF3 + AMP | Back to a low, but now side switches and can be turned into a full combo |
| Charging Pain Delay | BF3 Hold 3 | Delays the attack animation, good for traveling longer distances |
| Charging Pain Cancel | BF3 + DD | Allows you to play mind games |
| Tactical Takedown | DB3 | Fantastic combo ender |
| Enhanced Tactical Takedown | DB3 + AMP | Adds armor, good for wake-up |
Reiko's Best Kameos
Regarding Kameos, Reiko benefits a lot from two core Kameos, Darrius and Stryker.
Darrius is a great tool to enhance Reiko's damage through the aforementioned BDF1 into Darrius' neutral Kameo assist, which re-stands the opponent, giving you the opportunity to go into a full combo. But just generally he can add damage on top of the already great numbers Reiko produces.
Stryker's contributions are targeted more towards leveling the scales on the neutral when attempting to close the gap. Stryker's grenade play a big role in using BF3 more often. His overhead is also a good tool to have when facing good offensive players to bring in a low/overhead mixup.
That is not to say other Kameos can't work, Kano is another good pick, as he can help with that same BF3 on neutral issue. Jax can bring a lot of damage to the table and can serve as a second pick behind Darrius if you'd rather keep some Kameo bar. Finally, both Sektor and Scorpion can also fill in the more general role of damage amplifier or combo extenders respectively.
Reiko's Bread & Butter Combos
Easy
- F1,2, BF3(U), S3,4, DB3
- F1,2, BF3(U), S3,4, BF3(AMP), S3, DB3
- BF3(AMP), S3,4 DB3
- You want to dash towards your opponent after the amplified BF3.
Normal
- F+1,2,4 BF3(U), S3, BDF1
- BF3(AMP), BF3(U), S1, BDF1
- You want to dash towards your opponent after the amplified BF3.
- S1,2 BF3(U), S1, S3, BDF1
- F1,2, BF3(U), S3, BDF1, KAMEO, S3, BF3(AMP), S3, DB3
- Requires Darrius.


