
Guides
Overview
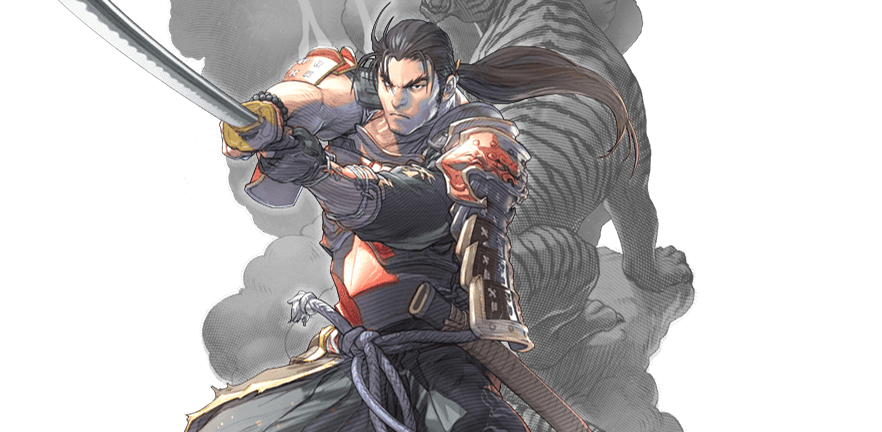
Mitsurugi is one of the most iconic SoulCalibur characters and one of only two, alongside Voldo, to appear in all mainline SoulCalibur games. Unlike Voldo, however, Mitsurugi is a mostly straightforward character with a well-rounded and balanced movelist. He’s an excellent choice for anyone new to the series or players who wish for a solid character without any significant drawbacks.
General Strategy
As a well-rounded and fundamental character, Mitsurugi can handle most situations that come his way. Whether you want to play safe and poke away at mid-range, bait whiffs or play defensively, Mitsurugi can do it all.
However, his overall kit is best suited for aggressive playstyle, rushing down opponents, and applying pressure. Your usual gameplan with Mitsurugi will center around finding an opportunity to get in and then conditioning your opponent to make mistakes or frustrating them with your constant pressure.
Poking
In SoulCalibur, you have three attack buttons. A is horizontal, B is vertical, and K is kicks. Vertical attacks are often the bread and butter of your offense and will often hit opponents regardless of crouching or standing, but they can be easily sidestepped. This is where horizontal attacks come into play. These attacks will catch opponents who try to sidestep but can whiff on jumping or crouching opponents if they hit low or high. Meanwhile, kicks are usually swift but stubby or low damage attacks that can help you to interrupt the opponent’s pressure if your other attacks are too slow.
For Mitsurugi, you will want to poke away at opponents with various vertical attacks like BB, 4B, 6BB, 2B, 44B, and 22B. These moves are safe and cover a decent bit of space while harassing opponents and chipping away their guard gauge. B6 can also serve as your go-to whiff punish, however, at -14 on block, it’s not a move your want to throw out carelessly.
If opponents try to sidestep them, Mitsurugi has many horizontal strikes to catch them, such as AA, 6A, 4A, 66AA, 22A, and 44A. Horizontal attacks also have some of Mitsurugi’s best lows with 1A and 2A. When closer to the opponent, you can also use 3A, a stubby but safe mid that gives you a massive frame advantage on counter hit. If you feel like opponents might try to side-step, you can also use it to score a run counter on them.
When it comes to kicks, you have a few decent moves that can be used for poking. K is your generic fast kick, safe but doesn’t offer many rewards, mainly used to stuff opponent’s attacks. 6K is slower but still safe and provides great advantage on both hit and CH. 3K serves as ok mid check.
Approach
Since a large part of Mitsurugi’s game plan revolves around close-range pressure, you’ll need to learn how to approach opponents properly.
Despite how generally well-rounded Mitsurugi is, his approach tools are not the best. Strings like 66AA and 4KB are some of his best options and are safe on block, but they have two glaring flaws. Due to their slow speed, experienced opponents will duck the second hit of 66AA or step the second hit of 4KB. However, you can still use the first hit of these attacks or 66K for a less reactable approach.
Due to the flaws mentioned above, you will often find yourself sitting around mid-range and waiting for an opening to run in. At that point, you can go for some basic close-range pokes like 3A or 1B. Alternatively, you can use 4\6K+B to manually put yourself into a stance or use one of the attacks that allow for stance transitions. More on that later.
Stances and mix-ups
A lot of Mitsurugi’s pressure comes from his lows, lethal hit attacks, and powerful moves locked behind stances. You can start some of the essential pressure with a generic low like 2K, 22/88K, 236K, or 1B, an unsafe low that can be punished even on hit but can be followed up with a second hit to get a lot of damage on opponents who try to punish you.
Some of his other strong lethal hit moves include:
3B - Slightly unsafe mid that applies lethal hit on crouch guarding opponents, an excellent option for when you condition opponents to expect a low.
B6 - A high hit with decent forward momentum that will apply a lethal hit on opponents who try to step back and get away from you.
RLC B - Slow attack with good frame advantage. Deals a big chunk of damage to the guard gauge and applies lethal hit on guard break.
22/88 A - Will apply a lethal hit if used as a whiff punish.
To keep stepping opponents in check, you also have 3A, an excellent move that applies a long stun on opponents who try to step and gives you a massive advantage.
With that said, some of your best options will lie in stances, so let’s look at both of them more closely.
Mist
Your primary stance for pressure. The main highlight of Mist is the extremely fast MST BBBB string, which is plus on block and a natural combo on counter hit. The combination of speed and CH threat will make opponents scared of challenging, leading to sidestepping or ducking. To catch sidesteps you have MST A - a high horizontal attack with great reach but slow speed. For crouchers, you have a hit throw in MST 6B, and MST A+B, a safe mid that has a Revenge property. If the opponent hits you during this move, you will armor through it and deal great damage in return.
Mist transitions
| Input | Note |
| 6B+K | Transitions automatically |
| RLC B+K | Transitions automatically |
| 4A | Hold A |
| BB | Hold B |
| BBB | Hold B |
| 6BB | Transitions automatically and second B can be charged |
| 1KB | Hold B |
| 4A+B | Press G during attack startup |
| 66/33/99AA | Press G during startup of the second hit |
| 44/11/77BA | Hold A |
| RLC A | Hold A |
Relic
This stance has fewer options than Mist, but what’s there is rather useful. Namely, RLC AA is a solid horizontal string. The first attack is a basic horizontal poke that leaves you at merely -2 on block, but the second hit is a Break Attack, leaving you at +10 and dealing a lot of guard gauge damage. RLC B is another Break Attack option out of this stance. It's slightly slower than RLC A, but still relatively quick and gives you a fantastic advantage, even granting Lethal Hit on guard break. If the opponent tries to 2A or 2K when they see you enter Relic stance, you also have RLC K, a jumping tackle that goes over lows but is unsafe; otherwise, better used as a read.
Relic transitions
| Input | Note |
| 4B+K | Transitions automatically |
| MST B+K | Transitions automatically |
| MST B | Hold B |
| MST 4B | Hold B |
| 6A | Hold A |
| 1B,A+B | Hold A+B |
| 44/11/77A | Hold A |
| 66/33/99B | Hold B |
| 44/11/77BAB | Press G during startup of the third hit |
| 66/33/99A+B | Press G during attack startup |
| SS K | Hold K |
| RE AA | After Reversal Edge A hits, press and hold A |
Silent Step
Mitsurugi’s crouch dash can be done by inputting 236. Less significant than the stances but still offers some good moves. SS AA is a quick high-high string with easy Just Frame timing; however, it does not jail, so sharp opponents might duck and punish. SS B is a versatile mid move that does a chunk of damage to either health or guard gauge if blocked. If your opponent is conditioned to block, you can charge this move for an even greater reward. Lastly, you have SS K, one of your go-to low pokes that also transitions to RLC with decent frame advantage on hit.
Guard Breaks
Another crucial part of Mitsurugi’s pressure. With a combination of his normal strings and Break Attacks, Mitsurugi can quickly build up guard gauge damage and inflict a Guard Crush. This puts the opponent into the counter-hit state and allows you to do a big damage combo depending on which move applies the Guard Crush status. Luckily, some of Mitsurugi’s best guard break attacks allow minimum scaling on combos.
Many of these attacks also feed pretty well into his normal gameplay. For example, in the 1BB string, if 1B is blocked, you can go for an A+B extension, either taking a chunk of your opponent's life or doing severe damage to their guard gauge. Similarly, his slow 1A low attack can be canceled into an A+B Break Attack. Whenever you transition into the RLC stance, you also have great Break Attacks with RLC AA and RLC B.
Soul Charge and Shura Blade
Soul Charge and Shura Blade are not as complex as Mitsurugi’s stances but add valuable options to his offense.
Starting with Soul Charge, it greatly buffs several of Mitsurugi’s key moves, improving their properties in various ways or adding extra attacks only available in Soul Charge. For example, your staple 3B launcher now has a B follow-up that can be delayed, has Break Attack property, and leaves you plus on block. The kB attack similarly becomes a Break Attack and can no longer be punished. Due to changes like these, Soul Charge gives Mitsurugi a massive comeback potential. If you hit opponents, you hit very hard, and if you don’t, you’re still likely dealing enormous damage to their guard gauge.
Despite how impressive it looks visually, Shura Blade only offers a few things, but at least you keep it for the whole round once you do get it. Your 66BB and WR B+K now have an optional B follow-up that makes both attacks safe at only -8. It also gives you a new 236B+K attack which is disastrous on block but is pretty fast at i12, making it a decent block or whiff punish option.
While these additions are indeed nice, you shouldn’t be in a rush to get into the SB state every round. Instead, it can be a nice bonus for landing a CA combo or using A follow-up after Reversal Edge. Outside of that, you can activate it manually by pressing 8B+K during SC or through the somewhat obscure option of getting hit by a projectile while in an RLC stance.
Base Moves:
-
3B - Your staple launcher. Fairly minus on block, so you should try to space it properly. Due to LH property on crouching opponents, it can lead to a devastating combo on opponents who try to crouch your lows.
-
AA - Fairly standard AA that can catch stepping opponents and allows you to gain some space control by pushing away opponents.
-
3A - Very useful poke when you're at point-blank range. If your opponent tries to step, it will give you a massive frame advantage to work with and is safe on block.
-
6A/4A - Both are very decent horizontals that get you in either of two stances with great advantage on hit.
-
BB - Standard vertical string with the added bonus of having a stance transition.
-
1BB - Somewhat tough to react to low move that nets you good damage on hit, and if blocked, you can use the A+B follow-up for a slow but safe Break Attack.
-
1KB - Big part of your low/mid mixup. At i18, it’s relatively hard to react to, but the frames are not great, so unless you catch opponents sidestepping, you will have to use a stance transition to be at -6 on hit instead of -14.
-
MST BBBB - Very versatile string and fast string. It becomes a natural combo on CH, the first hit can transition into Relic, and if blocked, you have both frame advantage and have dealt good damage to the opponent's guard.
-
6BB - Fast stabs with good range that get you right into the Relic stance.
-
B6 - Powerful vertical strike that moves you forward, heavily punishes backdashing opponents, and serves as a decent whiff punisher but unfortunately doesn't hit crouching opponents.
-
66/33/99AA - One of your more substantial ways to get in on opponents. Using both hits is not always the best option, however.
-
RLC AA - Very fast string that locks down sidesteps, is safe, and has a Break Attack on the second hit.
-
RLC B - Swift Break Attack that can be guaranteed depending on how you transition into the stance.
-
22/88B - Incredible vertical strike that takes a chunk out of the opponent's guard gauge, only -10 on hit, and stuns the opponent if it hits, allowing you to deal extra damage.
-
44/11/77A - Somewhat slow but extremely rewarding horizontal strike that can lead to massive damage if you catch opponents stepping.
Situational Moves:
-
236B - Versatile strikeout of Silent Step that can be charged to do extra damage. Even though it's rarely minus, most opponents will be knocked too far back to punish it properly. The charged version can do extreme damage to the opponent's HP or guard.
-
66A+B - This attack has a deceptively massive range, making it a powerful tool for whiff punishment and even poking. However, it is pretty slow and should be used with caution.
-
4KB - One of your potential get-in options, even though it's safe on block, wary opponents can step and punish it due to how telegraphed it is.
-
66K - Rather quick tackle that leaves you -8 on block. It's very linear and will lose to opponents who stay mobile but can net you a whopping +10 on hit.
-
1A - Super slow low attack. Most opponents aren't too likely to fall for it, but thanks to A+B cancel, you can trick them into eating a Break Attack.
-
WR K - Quick while rising attack that moves you a bit forward, can be used to interrupt opponents or get you closer depending on the situation.
Punishment
Normal
-
i12 - AA, K, [Shura Blade] SS B+K
-
i14 - BB, SS AA, Critical Edge
-
i16 - SS B, B6, 66K
-
i18 - 3B, 6A+B, 6BB
-
i20 - 66B, 4KB
Crouching
-
i12 - WR K, [Shura Blade] SS B+K
-
i14 - SS AA, Critical Edge
-
i16 - SS B, WR B, 66K
-
i18 - 6A+B, WR AA
-
i20 - 66B, 4KB
Basic Combos
Normal Combos:
-
3B > SS B
-
66B~RLC > RLC AA > RLC B
-
1AB > SS AA
Counter hit combos:
-
MST KB > 6BB > MST B > RLC AA
-
B6 > 1A
-
99/33K > 1A
Guard Break Combos:
-
1B,A+B > RLC B > KB
-
1KB~MST > 6B
-
WR B,2B > 66A+B
Lethal Hit Combos:
-
6B > B+K,B [JF] > kB > 66A+B
-
A+B > kB > 66A+B
-
22/88A > B+K,B [JF] > kB > 66A+B
Tips against Mitsurugi
-
Use your range - Getting in close range is one of Mitsurugi’s weaker points. If you’re playing a character that excels at mid to close range it’s in your best interest to try and keep Mitsurugi out with your long-range pokes.
-
Use your speed - If you’re playing a character with i10 attacks like Yoshimitsu, Xianghua, Azwel, Raphael, or Voldo, you can easily interrupt some of Mitsurugi’s stance transitions, removing a tool from his kit.
-
Punish - Mitsurugi has many moves that can either be ducked, interrupted, or simply punished on block if he commits or poorly spaces them. Recognizing these moments is crucial for not letting Mitsurugi run his game on you.
Summary
Mitsurugi is an excellent, well-rounded character that can suit both experiences and new SoulCalibur players. Despite a strong focus on offense, Mitsurugi is not exactly lacking in other areas either, allowing you to stick with your preferred playstyle. Those who decide to stick with him will also have plenty of room to experiment with unique setups and ways of conditioning their opponent.
Strengths
-
Suffocating offense - Mitsurugi excels at putting pressure on his opponents with a combination of his pokes, Break Attacks, basic mixups, and frame traps. This could prove to be a great challenge for opponents with lacking defense.
-
Swiss army knife - With a tool for almost any situation, Mitsurugi can fluidly adapt to whatever opponent might be doing or support those who enjoy a flexible playstyle.
-
Easy to play - Despite having Mist and Relic stances, Silent Step crouchdash, and unique Shura Blade power-up, Mitsurugi is a relatively easy character to pick up, making him a good pick for beginners and those who want to focus on fundamentals.
Weaknesses
-
Poor approach tools - One of the few areas where Mitsurugi is genuinely lacking. His approach options are few and most aren’t that good, meaning that you’ll often have to rely on your own good judgment and movement to get close.
-
High-risk, high-reward - Mitsurugi’s reward is largely proportional to the amount of risk he has to take. If you want to pull off big launches or damaging mixups, be aware that things could go wrong.
-
Predictable - The downside of having a simple and straightforward toolkit is that there’s not much you can do to catch your opponents off guard compared to someone like Voldo or Yoshimitsu.