


Guides
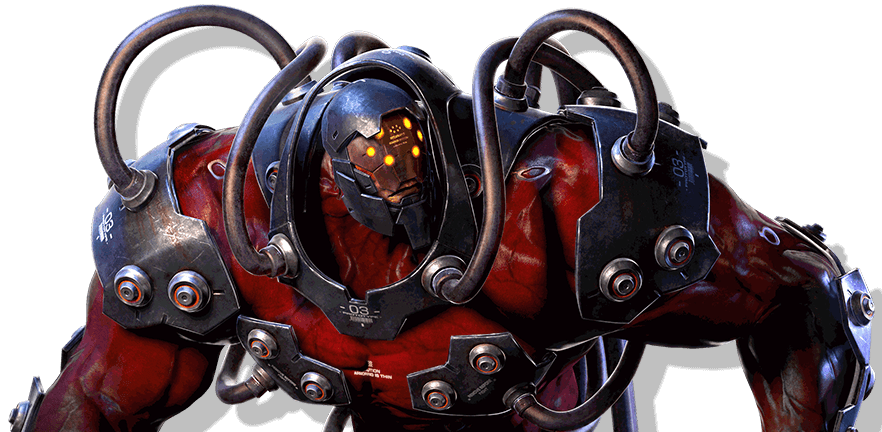
Gigas guide
Although often overlooked in competitive settings, Gigas can be quite a fun palette cleanser for players with an extensive history in other characters. To be great with Gigas, it is a situation where one must practice a handful of elements nearly to perfection.
It is not a character where playstyles flourish, and you have to be dedicated to how Gigas plays and understand what options are available while staying on that path. Your command grab, the overkill throw, is almost a mantra that you will have to use with Gigas, as it is powerful, far-reaching, and potential both to set it up and to follow after it.
Key Strengths & Weaknesses
Gigas lacks speed. Many of its moves fall into one of three categories of safety. Completely safe, just barely safe in the right circumstances, and not safe at all. One of these is larger than the others, and you can probably guess which. It's the unsafe ones and by a lot.
Gigas has one exciting mechanic attached to most of his big-hitting moves, Charging them up. Doing so does open you up to potential punishment from your opponents. But if you can land them, they can cause devastating damage.
His reach is also a surprisingly welcome attribute. Gigas is massive, but the extra reach from his size allows him to convert simple punishes, like d2 or 1,2, whenever his opponents make an unsafe move or whiff their attack entirely.
Overall, you want to keep track of your spacing and what you can and cannot punish. Moves like 1 and 2 can be safe on their own, but their combination of 1,2 should be reserved for clear punishes. Another area you can look to lean on for your matches is the wall. There you can often exert the most amount of damage available to Gigas with your command throw, which can balloon up to 50% of your opponent's health.
While you try to improve with Gigas, you will feel the character is slow and maybe not as responsive as you would like, or that you are being countered more often than what feels right. Do not worry. Keep practising and going over your win condition and the openings you have for punishing opponents.
Basic Moves
| Input | Hit spot | Damage | Startup frame | Block frame | Hit frame |
|---|---|---|---|---|---|
| 1 | High | 7 | 10 | +1 | +8 |
| 2 | High | 10 | 10 | -5 | +6 |
| 3 | Mid | 17 | 14~15 | -9~-8 | +2~+3 |
| 4 | Mid | 20 | 16~17 | -9~-8 | +2~+3 |
| f+1 | High | 7 | 10 | +1 | +8 |
| f+2 | High | 20 | 16~18 | -9~-7 | +7~+9 |
| f+3 | Mid | 17 | 23 | -9 | +9 |
| f+4 | Mid | 20 | 24 | -14 | KND |
| d/f+1 | Mid | 14 | 14 | -6 | +4 |
| d/f+2 | Mid | 15 | 15 | -7 | +6 |
| d/f+3 | Mid | 11 | 13 | -9 | +4 |
| d/f+4 | Mid | 12 | 14 | -3 | +3 |
| d+1 | Sm (TC) | 5 | 10s cs4~ | -5 | +6 |
| d+2 | Mid | 13 | 15 | -14 | KND |
| d+3 | Low | 15 | 16 | -12 | -1 |
| d+4 | l (TC) | 7 | 12s cs4 | -13 | -2 |
| d/b+1 | Sm (TC) | 5 | 10s cs4~ | -5 | +6 |
| d/b+2 | l (TC) | 20 | 23~24 cs6~ | -14~-13 | +3~+4 |
| d/b+3 | l (TC) | 16 | 21s cs6~ | -20 | -4 |
| d/b+4 | l (TC) | 8 | 14s cs4~ | -13 | -2 |
| b+1 | Mid | 20 | 20~22 | -15~-13 | Launch |
| b+2 | Mid | 20 | 20 | -13 | KND |
| b+3 | Mid | 26 | 21~23 | -9~-7 | KND |
| b+4 | Mid | 20 | 20~22 | -9~-7s | +1~+3s |
| u/b or u+1 | m (TJ) | 16 | 18 js9~ | -8 | +3 |
| u/f+1 | m (TJ) | 25 | 23~24 js9~ | -9~-8s | KND |
| u/b or u or u/f+2 | High | 17 | 15~16 | -12~-11 | +9~+10g |
| u/b+3 | m (TJ) | 13 | 20~22 js9~ | -10~-8 | +3~+5 |
| u+3 | m (TJ) | 15 | 20~22 js9~ | -10~-8 | +3~+5 |
| u/f+3 | m (TJ) | 17 | 20~22 js9~ | -3~-1 | +6~+8 |
| u/b+4 | m (TJ) | 20 | 25~26 js9~ | -13~-12 | -1~0 |
| u+4 | m (TJ) | 20 | 25~26 js9~ | -13~-12 | KND |
| u/f+4 | m (TJ) | 20 | 25~26 js9~ | -13~-12 | Launch (JG?) |
| u/f, n+4 | m (TJ) | 25 | 23(29,35) js9~33 | -11(-13) | Launch (JG?) |
| WS+1 | Mid | 17 | 11~12 | -7~-6 | +4~+5 |
| WS+2 | Mid | 19 | 15~16 | -5~-4 | +4~+5 |
| WS+3 | Mid | 25 | 18~20 | -13~-11 | Launch (JG?) |
| WS+4 | Mid | 21 | 13~14 | -12~-11 | KND |
| FC+1 | Sm (TC) | 5 | 10s cs1~ | -5 | +6 |
| FC+d/b or d+2 | Sm (TC) | 8 | 11s cs1~ | -4 | +7 |
| FC+3 | l (TC) | 12 | 16s cs1~ | -17 | -3 |
| FC+4 | l (TC) | 10 | 12s cs1~ | -15 | -4 |
| SS+1 | High | 7 | 10(11~) | +1 | +8 |
| SS+2 | High | 25 | 28~29a (37~) | -9~-8 | KND |
| SS+3 | Mid | 20 | 14~15 (15~) | -9~-8 | +2~+3 |
| SS+4 | Mid | 23 | 16~17 (17~) | -9~-8 | +2~+3 |
| BT 1 or 2 | High | 15 | 8 | -8 | +3 |
| BT 3 or 4 | High | 25 | 10 | -8 | KND |
| BT d+1 or 2 | Sm | 10 | 10s cs1~ | -2 | +9 |
| BT d+3 or 4 | Low | 12 | 10s cs1~ | -11 | +3 |
Special Moves
| Input | Hit spot | Damage | Startup frame | Block frame | Hit frame |
|---|---|---|---|---|---|
| in rage 1+2 | m (TJ) | 55 | 20~21 pc8~17 js8~17 | -42~-41 | KND |
| in rage f+3+4* | ! (GOL) | 0 | 29 | +81 | +81 |
| Rage drive GOL 1 (After two steps) | m | 30 | 26~27 (85~86) | +7~+8 | KND |
| Rage drive GOL 1 (After three steps) | m | 45 | 26~27 (114~115) | +7~+8 | KND |
| Rage drive GOL 2 (After two steps) | h! | 45 | 24~26 (83) | KND | KND |
| Rage drive GOL 2 (After three steps) | h! | 60 | 24~26 (112) | KND | KND |
| Rage drive GOL 1+2 (After two steps) | m (TJ) | 30 | 49~55a,d (105~) js36~ | +4~+10 | KND |
| Rage drive GOL 1+2 (After three steps) | m (TJ) | 60 | 49~55a,d (136~) js36~ | +4~+10 | KND |
| Rage drive GOL b+2 (After two steps) | m | 20 | 30 | -13 | KND |
| Rage drive GOL b+2 (After three steps) | m | 30 | 30 | -13 | KND |
| Rage drive GOL b+2*(After two steps) | m | 40 | 51~52 | +25g | KND |
| Rage drive GOL b+2*(After three steps) | m | 50 | 51~52 | +25g | KND |
| Rage drive GOL b+2*F(After two steps) | m | 40 | 30 | +30g | KND |
| Rage drive GOL b+2*F(After three steps) | m | 50 | 51~52 | +30g | KND |
| 1 | h | 7 | 10 | +1 | +8 |
| 1, 2 | h, h | 7,28 | 10 | -17 | KND |
| 2 | h | 10 | 10 | -5 | +6 |
| 2, 1 | h, h | 10,12 | 10 | -6 | +5 |
| 2, 1, 3+4 | h, h, (SG) | 10,12 | 10 | -4 | +7 |
| 3 | m | 17 | 14~15 | -9~-8 | +2~+3 |
| 4 | m | 20 | 16~17 | -9~-8 | +4~+5 |
| f+2 | h | 20 | 16~18 | -9~-7 | +7~+9 |
| f+2, 1 | h, h | 20,17 | 16~18 | -3~-2 | +5~+6 |
| f+2, 1, 1 | h, h, m | 20,17,25 | 16~18 | -12~-11 | KMUD |
| f+2, f+1 | h, h | 20,20 | 16~18 | -9~-8 | CS |
| f+2, d+1 | h, m | 20,17 | 16~18 | -13~-12s | +2~+3s |
| f+2, d+1, 3+4 | h, m, (SG) | 20,17 | 16~18 | -2s | +13s |
| f+3 | m | 17 | 23 | -9 | +9 |
| f+3, 2 | m, m | 17,20 | 23~24 | -13 | KND |
| f+3, 2, F | m, m, (GOL) | 17,20 | 23~24 | -27 | KND |
| f+3, 2* | m, m | 17,40 | 23~24 | +15g | KND |
| f+3, 2*, F | m, m, (GOL) | 17,40 | 23~24 | +18 | KND |
| f+4 | m | 20 | 24 | -14 | KND |
| f+4, F | m, (GOL) | 20 | 24 | -18 | KND |
| f+4* | m | 40 | 43~44 | +26g | KND |
| f+4*, F | m, (GOL) | 40 | 43~44 | +18 | KND |
| f+1+2 | h | 20 | 13 | -5 | +6s |
| f+1+2(CH in front) | h, (throw) | 18,10*4 | 13 | Throw | |
| d/f+1 | m | 14 | 14 | -6 | +4 |
| d/f+2 | m | 15 | 15 | -7 | +6 |
| d/f+2, 1 | m, m | 14,21 | 15 | -13~-12 | KND |
| d/f+3 | m | 11 | 13 | -9 | +4 |
| d/f+3, 1 | m, h | 11,12 | 13 | -4 | +4 |
| d/f+3, 1+2 | m, m | 11,20 | 13 | -16 | CS |
| d/f+3, 1+2, 1+2 | m, m, h | 11,20,20 | 13 | -1~0 | KND |
| d/f+4 | m | 12 | 14 | -3 | +3 |
| d/f+4, 1+2 | m, m | 12,30 | 14 | +1~+2s | +5~+6s |
| d/f+4, 1+2, 3+4 (SG) | m, m | 12,30 | 14 | +3~+4s | +7~+8s |
| d/f+1+2 | mm | 13,13 | 25~26, 47~48 | -20~-19 | -9~-8s |
| d/f+1+2, 1+2 | mm, m | 13,13,17 | 25~26, 47~48 | -18~-17s | KND |
| d+2 | m | 13 | 15 | -14 | Launch |
| d+3 | l | 15 | 16 | -12 | -1 |
| d+3, 2 | l, m | 15,20 | 16 | -12s | 0s |
| d+1+2 | m | 30 | 30~31 pc8~29 | -13~-12 | KND |
| d+3+4 | (Special) | pc6~ | Power crush | ||
| d/b+2 | l (TC) | 23 | 23~24 cs6~ | -14~-13 | +3~+4 |
| d/b+3 | l (TC) | 16 | 21s cs6~ | -20 | -4 |
| d/b+3, 2 | l, h (TC) | 16, 20 | 21s cs6~ | -9 | Tail spin |
| d/b+4 | l (TC) | 8 | 14s cs4~ | -13 | -2 |
| d/b+1+2 | m | 35 | 29~32 | -8~-5 | KND |
| b+1 | m | 20 | 20~22 | -15~-13 | Launch |
| b+2 | m | 20 | 20 | -13 | KND |
| b+2, F | m, (GOL) | 20 | 20 | -18 | KND |
| b+2* | m | 40 | 41~42 | +15g | KND |
| b+2*, F | m, (GOL) | 40 | 41~42 | +18 | KND |
| b+3 | m | 26 | 21~23 | -9~-7 | KND |
| b+4 | m | 20 | 20~22 | -9~-7s | +1~+3s |
| b+1+2 | m | 30 | 25~26 | +4~+5s | +5~+6s |
| b+1+2, 3+4 (SG) | m | 30 | 25~26 | +6~+7s | +7~+8s |
| u/f+1 | m (TJ) | 25 | 23~24 js9~ | -9~-8s | KND |
| u/b+3 | m (TJ) | 13 | 20~22 js9~ | -10~-8 | +3~+5 |
| u+3 | m (TJ) | 15 | 20~22 js9~ | -10~-8 | +3~+5 |
| u/f+3 | m (TJ) | 17 | 20~22 js9~ | -3~-1 | +6~+8 |
| u/f+4 | m (TJ) | 20 | 25~26 js9~ | -13~-12 | Launch (JG?) |
| u/f (On the way up) n+4 | m (TJ) | 25 | 23 js9~ | -11 | Launch (JG?) |
| u/f+1+2 | m (TJ) | 35 | 35~63d js18~ | -19~+10 | KND |
| u/f+3+4 | m (TJ) | 25 | 31~36 js6~ | -3~+2s | +7~+12s |
| f, F+2 | m | 25 | 16~17 | -8~-7 | KND |
| f, F+3 | m | 23 | 17(18~) | -9 | +3 |
| f, F+4 | m | 17 | 17(18~) | -8 | +3 |
| f, F+4, 2 | m, m | 17,25 | 17(18~) | -13~-12 | Launch |
| f, F+1+2 | m | 20 | 17(18~) | -16 | CS |
| f, F+1+2, 1+2 | m, h | 20,20 | 17(18~) | -1~0 | KND |
| f, f, f+2 | m | 30 | 21~24 (24~) | +7~+10g | KND |
| WS+1 | m | 17 | 11~12 | -7~-6 | +5~+6 |
| WS+2 | m | 19 | 15~16 | -5~-4 | +4~+5 |
| WS+2, 3 | m, m | 19,24 | 15~16 | -13 | KND |
| WS+2, 4 | m, m | 19,20 | 15~16 | -14 | KND |
| WS+2, 4, F | m, m, (GOL) | 19,20 | 15~16 | -27 | KND |
| WS+2, 4* | m, m | 19,40 | 15~16 | +27g | KND |
| WS+2, 4*, F | m, m, (GOL) | 19,40 | 15~16 | +19 | KND |
| WS+3 | m | 25 | 18~20 | -13~-11 | Launch (JG?) |
| WS+4 | m | 21 | 13~14 | -12~-11 | KND |
| WS+4, 2 | m, m | 21,20 | 13~14 | -14 | KND |
| FC+d/f+2 | l (TC) | 20 | 28~29 cs1~ | -19~-18 | KND |
| SS+2 | h | 25 | 28~29a (37~) | -9~-8 | KND |
| Face down Grounded 2 | l? | 20 | 22~24 | -16~-14 | +1~+3 |
| Face down Grounded 1+2 | m | 30 | 35~36 | 0~+1 | KND |
| f+3+4 or From special move | (GOL) | 35~36 | |||
| GOL 1 (After two steps) | m | 25 | 26~27 (85~86) | -2~-1 | KND |
| GOL 1 (After three steps) | m | 40 | 26~27 (114~115) | -2~-1 | KND |
| GOL 2 (After two steps) | h! | 40 | 24~26 (83) | KND | KND |
| GOL 2 (After three steps) | h! | 55 | 24~26 (112) | KND | KND |
| GOL 1+2 (After two steps) | m (TJ) | 20 | 49~55a,d (105~) js36~ | +4~+10 | KND |
| GOL 1+2 (After three steps) | m (TJ) | 30 | 49~55a,d (136~) js36~ | +4~+10 | KND |
| d/b+3+4 (to SG) | (Special)(SG) | (TC) | 49~55, (136~) 36~ | ||
| SG 1 | m | 25 | 15~16 (36~) | -13~-12 | Launch (JG?) |
| SG 2 | m | 30 | 20~22 (41~) | 0~+2 | KND |
| SG 4 | l | 14 | 20~21 (41~) | -16~-15 | 0~+1 |
| SG 4, 1 | l, h | 14, 20 | 20~21 (41~) | -1~-0 | KND |
| SG u/b | (Special) (TJ) | a |
Best Gigas Moves
Overkill, command grab
Gigas inputting f,d/f,d,d/b,b,f+1+2, he grabs his opponent and launches them, dealing massive damage, even more, if they impact a wall. This move alone helps put psychological pressure on his opponent as they are heavily discouraged from playing with a defensive playstyle.
1, 2, punishing 10 frame combo
Coming in clutch is a very simple 1, 2. This move opens up when your opponent's whiffs or when you have 10 frames to space for your attack. Its range is excellent, and if you see your opponent blocking after the first hit, you can stop yourself and only be at a slight disadvantage. It deals a deceptively large amount of damage for its risk at 22.
Goliath and Golem, stances
At the core of Gigas' playstyle is his Goliath and Golem stances which affect a variety of his moves. Hold forward with F4, b2, ws2,4, f3,2, and f3+4 will put you in Goliath (GOL) stance. These moves are best used when closed to walls, as their wall splat deal a lot of damage, and their 50/50 mixes can apply a lot of pressure on your opponents. One comes from a mid and the other a high that deals a ton of damage. Obviously, defending the mid option is safer, as a result, is pushback, but leaving the high option up can result in nearly 70 damage if positioned in a wall. Most Goliath attacks rely on this idea, putting opponents in a tricky position where they either make a terrible choice and eat damage or a worse choice and eat a lot of damage. That is not to say they are impossible situations, but they are hard for anyone unfamiliar with them.
On the other hand is Golem stance, which is not as useful as it focuses on a different mix up with 3 options. The problem is that it falls prey to Giga's core weakness, frame data. The natural flow of this stance leads to a big open gap between you and your opponent while trying to use other followups like lows will just give your opponent that much more room to punish you.
Wall Combos
| Input | Notes | Damage |
| F2,1,1 | Delay the last 1 for more damage | Medium |
| f2,1,1 FB! b1+2 d2 b1 | Overkill grab, wall for best results | High |
| D1 > WS4,2 | Can be followed up by oki, or db1+2 if they wallsplat, or D3/Db2/Db3 for lows. | High |
| F2,1 > B2 | Best oki option | High |
| F2,1 > 3 | Can lead to a good oki | Medium |
| F2,D1~3+4 > 2 | Hits grounded and rolls | Medium |
| 1 > DF4, 1+2 | Medium | |
| D1 > WS4,2 | Medium |
Ways to Punish
As noted earlier, 12 is a fantastic way to punish opponents, but you also have fc d1, ws 1, ws 4, ws 23_4, and ws3, that while not as valuable in terms of damage, are good ways to open up your opponent in a pinch.
Playing Against Gigas
The most important part of playing against a Gigas is understanding those meaty hits are a threat, but they can also be punished pretty danm hard. For this reason, you will find more success putting forth your most clinical offence than trying to bait our attacks. A good Gigas will realise that you are trying to do that and use their safer tools to get you nearer to the wall, where they only need to land a couple of good hits after using some of their excellent lows to bring forth their damage fully.